Redeploying Your Lovable Project with Supabase on Zeabur: A Step-by-Step Guide
A comprehensive walkthrough on deploying and continuously updating your AI Co-Create application with a Supabase backend on Zeabur - Your AI Agent Engineer.
 Kyle Chung
From AI-Generated Idea to Live in Minutes: Redeploying Your Lovable Project with Supabase on Zeabur
A comprehensive walkthrough on deploying and continuously updating your AI Co-Create application with a Supabase backend on the Zeabur - Your AI Agent Engineer.
This technical article will provide a structured guide for developers on how to deploy a web application created with Lovable, an AI-powered app builder, and its integrated Supabase backend, onto the Zeabur. The focus will be on establishing a continuous deployment pipeline, enabling seamless updates and redeployments.
The Modern Development Trio: Lovable, Supabase, and Zeabur
This guide centers around three powerful technologies that streamline the development process:
- Lovable: An AI-powered software engineer that can turn your ideas into live applications in seconds. It's particularly powerful for generating a frontend and connecting it with backend services.
- Supabase: A popular open-source alternative to Firebase. It provides a suite of tools including a Postgres database, authentication, APIs, and file storage, making it a robust backend solution.
- Zeabur: A cloud platform designed to eliminate the friction of deployment. It automatically analyzes your code to determine the language and framework, then builds and deploys it with zero configuration.
By combining these tools, you can go from a simple prompt to a fully functional, deployed web application with a CI/CD pipeline in a matter of minutes.
Prerequisites: What You'll Need
Before you begin, ensure you have the following:
- A Lovable Project with Supabase: You'll need a project created on Lovable.dev that is integrated with a Supabase project. Lovable's AI can help you build a full-stack application with user authentication and a database.
- A GitHub Account: This is essential for version control and will act as the bridge between Lovable and Zeabur.
- A Zeabur Account: You'll need an account on Zeabur to deploy your application. You can sign up using your GitHub account.
- A IDE: You'll need an Integrated Development Environment (IDE) or code editor installed on your local machine (such as VS Code, WebStorm, or Sublime Text) to clone and work with the repository locally.
Step 1: Connecting Your Lovable Project to GitHub
The first step is to get your Lovable project's code into a GitHub repository. Lovable has a built-in integration that makes this process straightforward.
- Initiate the Connection: In your Lovable project editor, find the GitHub icon, usually in the top-right corner, and click "Connect to GitHub".
- Authorize Lovable: You will be redirected to GitHub to authorize the Lovable application. You can grant access to all repositories or select specific ones.
- Create the Repository: Once authorized, return to Lovable and click "Create Repository". Lovable will create a new repository in your GitHub account and push the initial project code to it.
This two-way sync means any changes you make in Lovable will be pushed to GitHub, and any changes you push to GitHub will be reflected in Lovable.
Step 2: Configuring Supabase Integration
To enable communication between your frontend application on Zeabur and your Supabase backend, you need to properly configure the Supabase integration and environment variables.
-
Deploy Supabase Template: Within your Zeabur project dashboard, click the "Add Service" button and select the Supabase template from the available options.
-
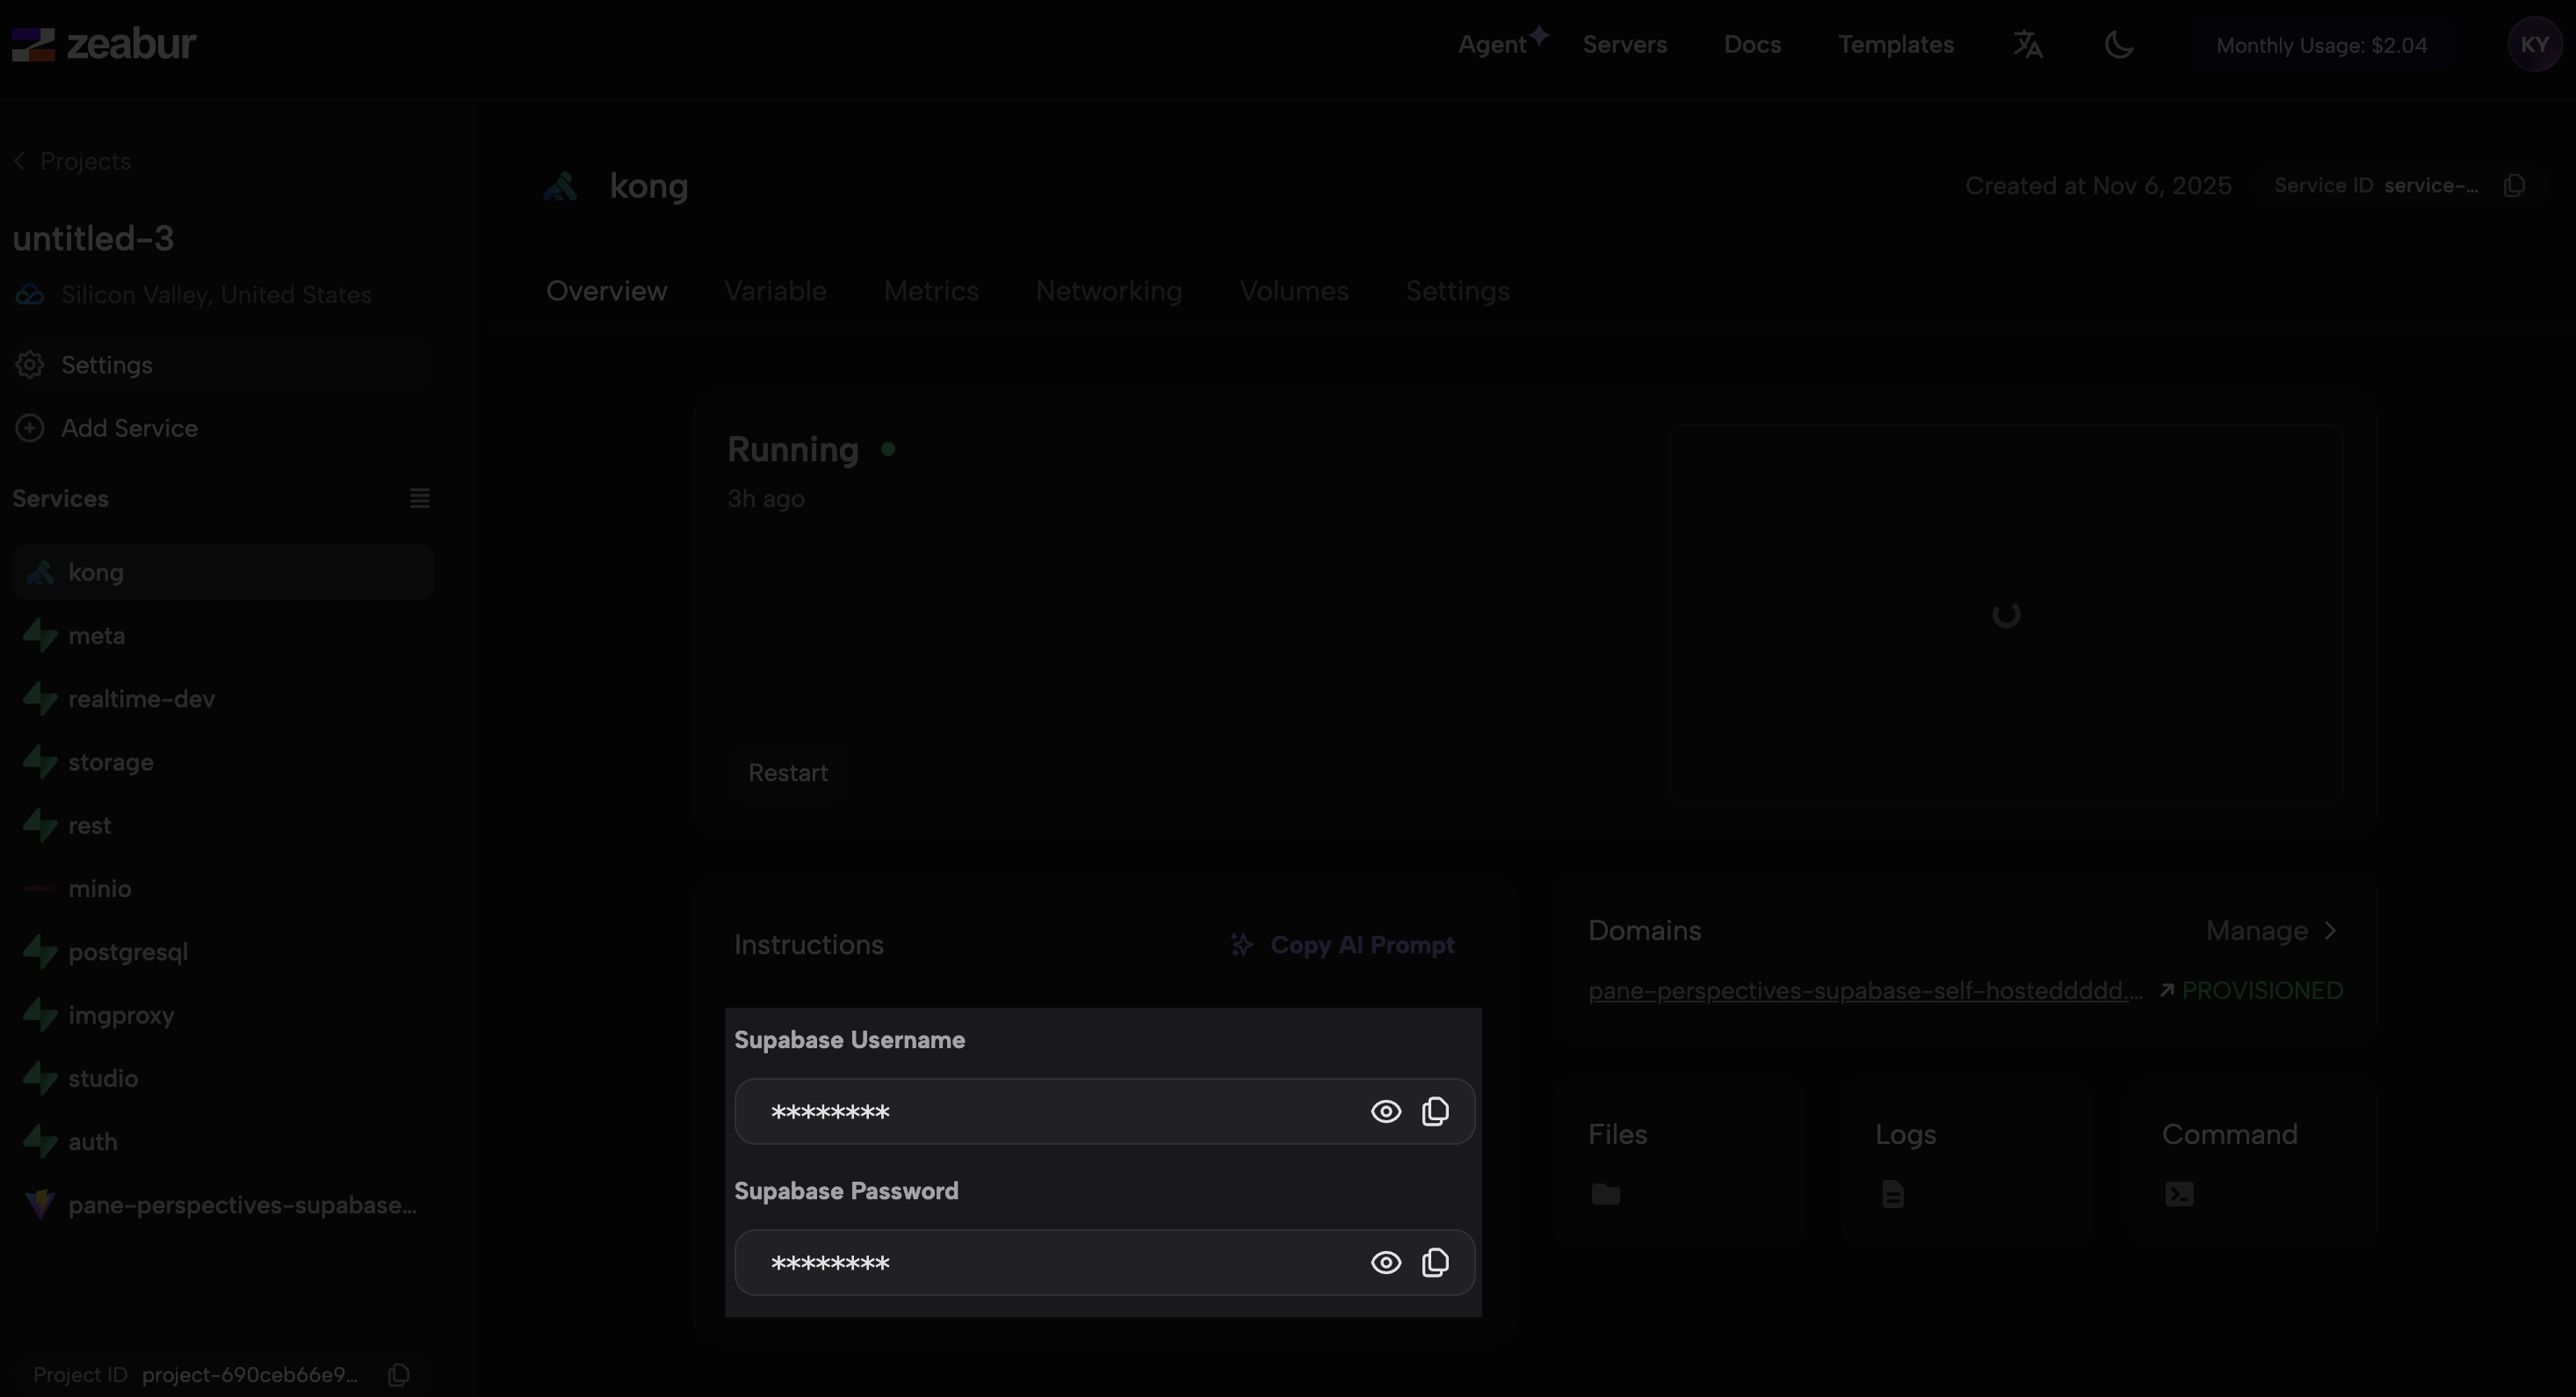
Configure Kong Gateway: Navigate to the Kong service panel. You will find the Supabase Username and Supabase Password. Access the domain settings and enter these credentials to establish the connection.
-
Locate Your Supabase API Keys: In your Supabase project dashboard, navigate to Settings → API to find your Project URL and
anonpublic key (also known asSUPABASE_PUBLISHABLE_KEY). Ensure that the environment variable names in your.envfile match exactly with the variable names used in your codebase.-
Click the
connectbutton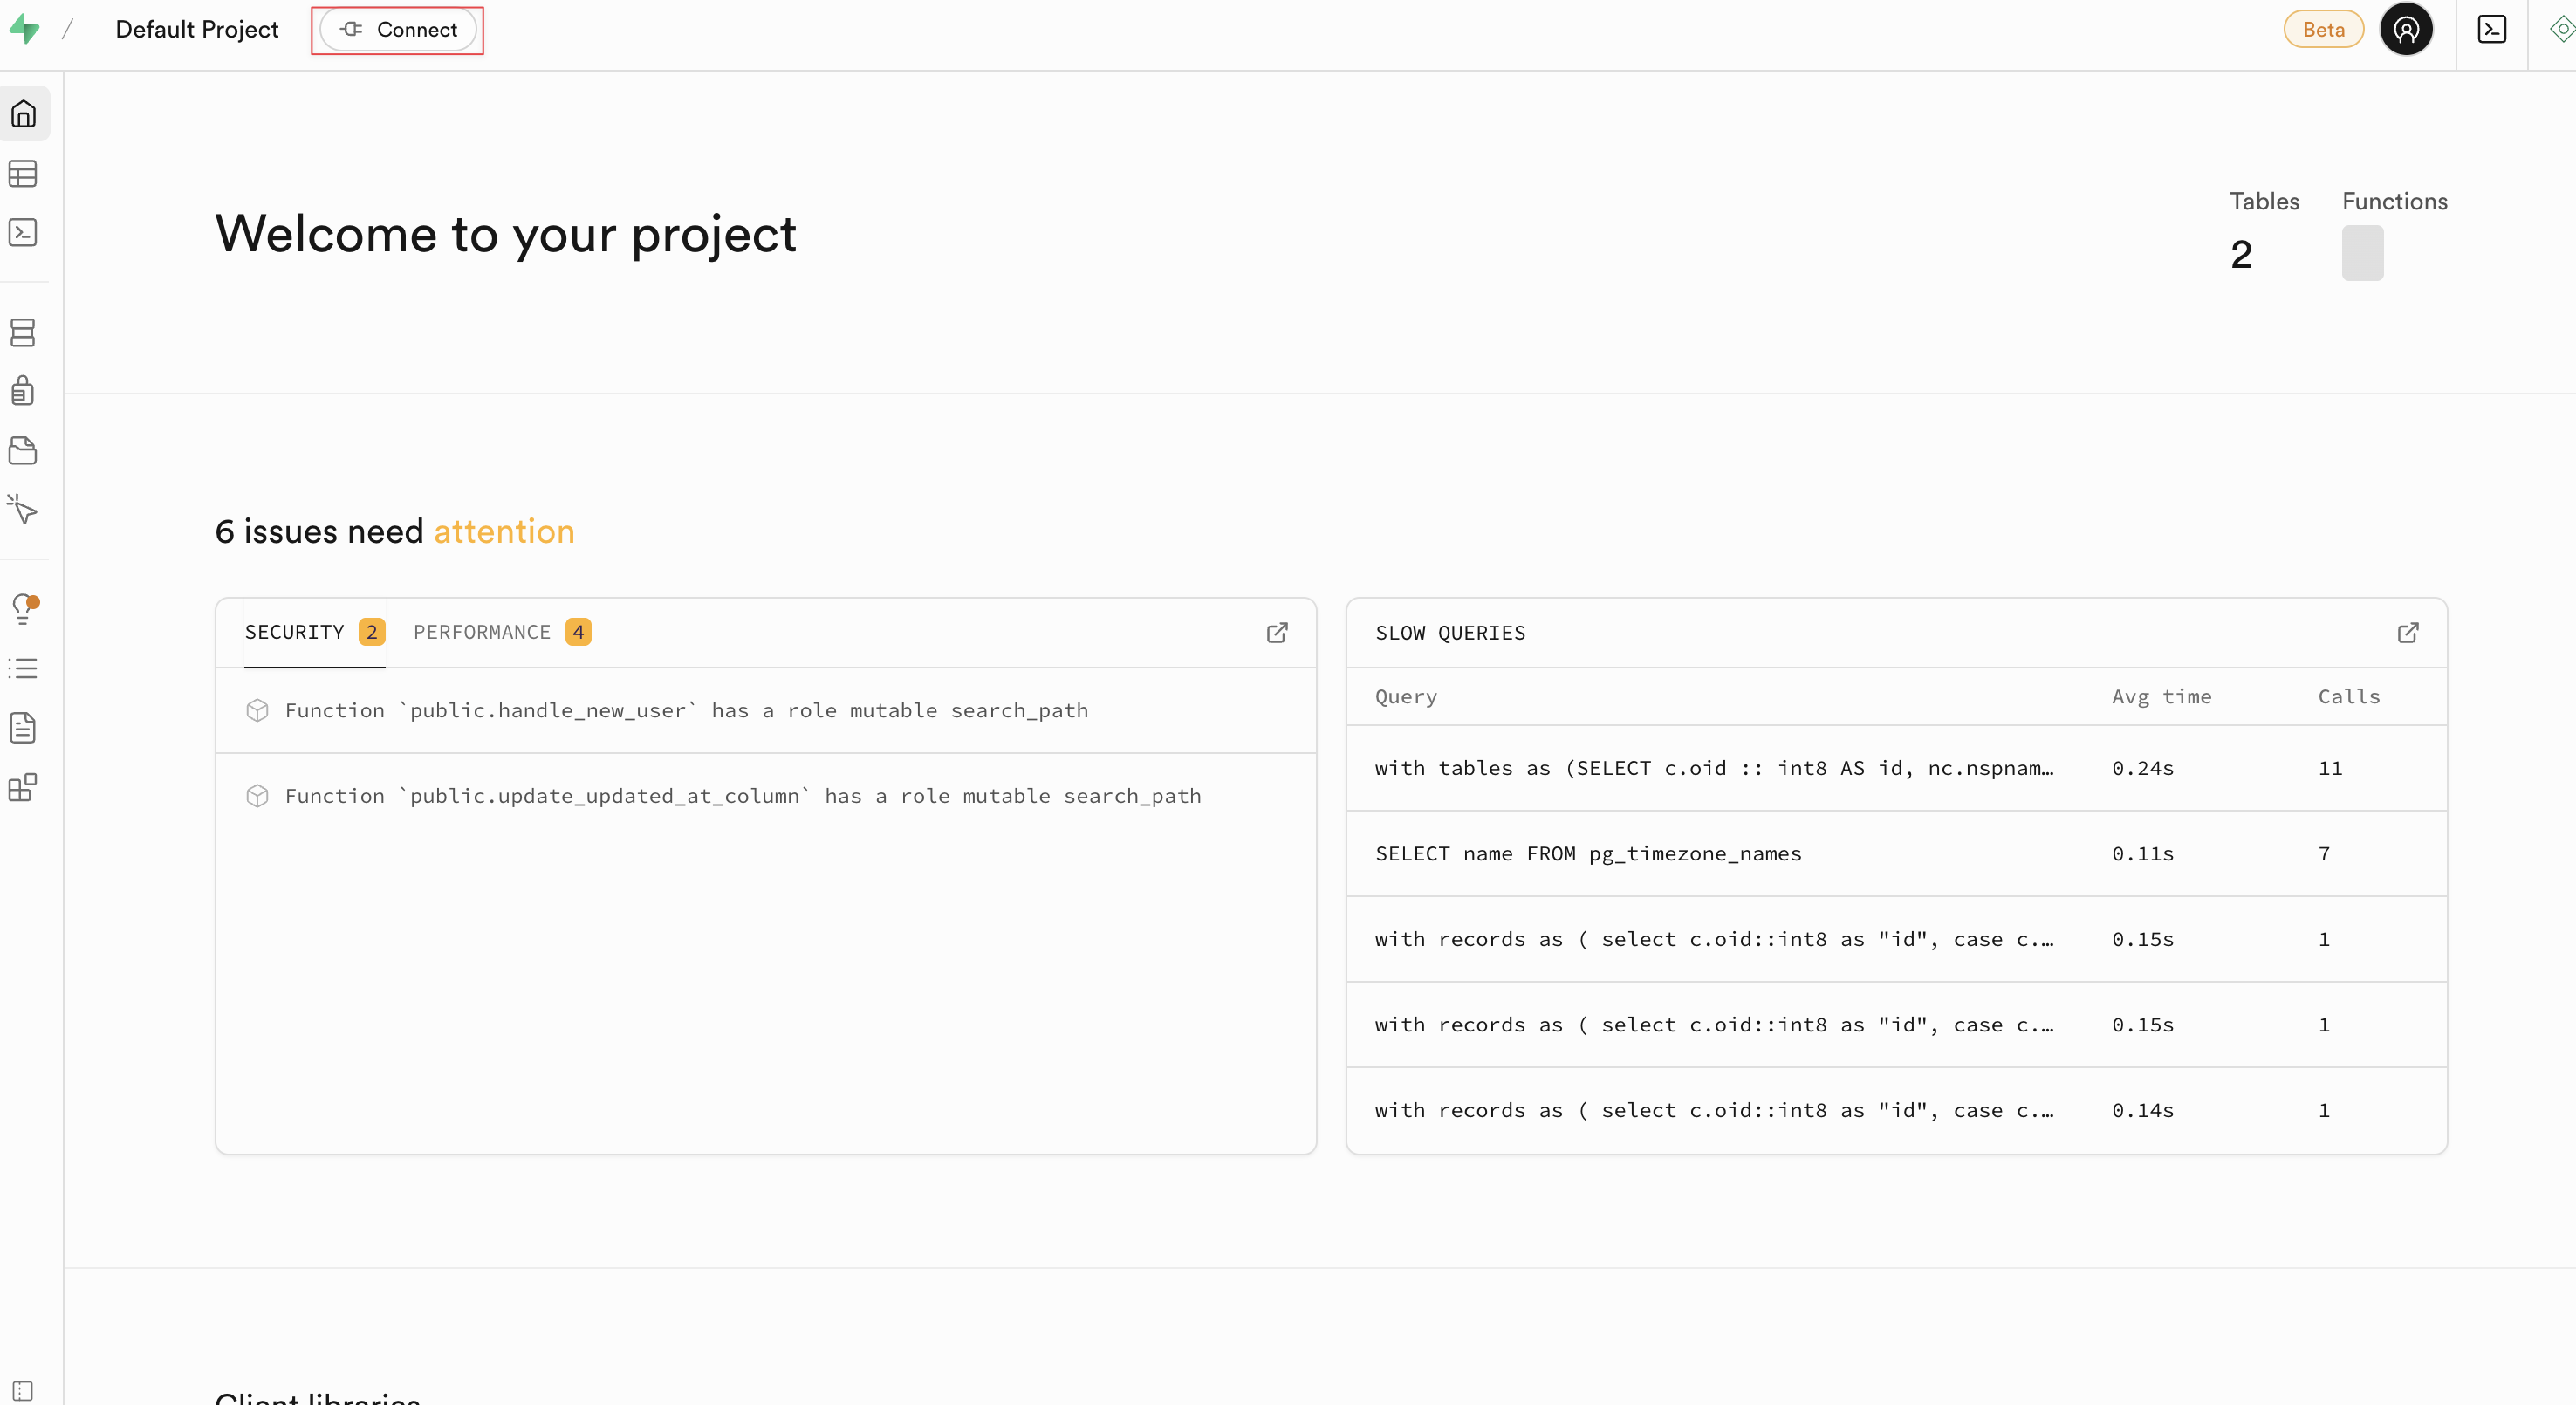
-
Find the correct Key Value Pair for your project

-
Step 3: Clone Your Lovable Project to Your Local IDE
-
Clone the repository to your local machine to enable continued development with your preferred IDE, access to advanced debugging tools, and the ability to work offline:
git clone [your-repository-url]-
Navigate to the project directory:
cd [your-project-name] -
Install dependencies:
npm install -
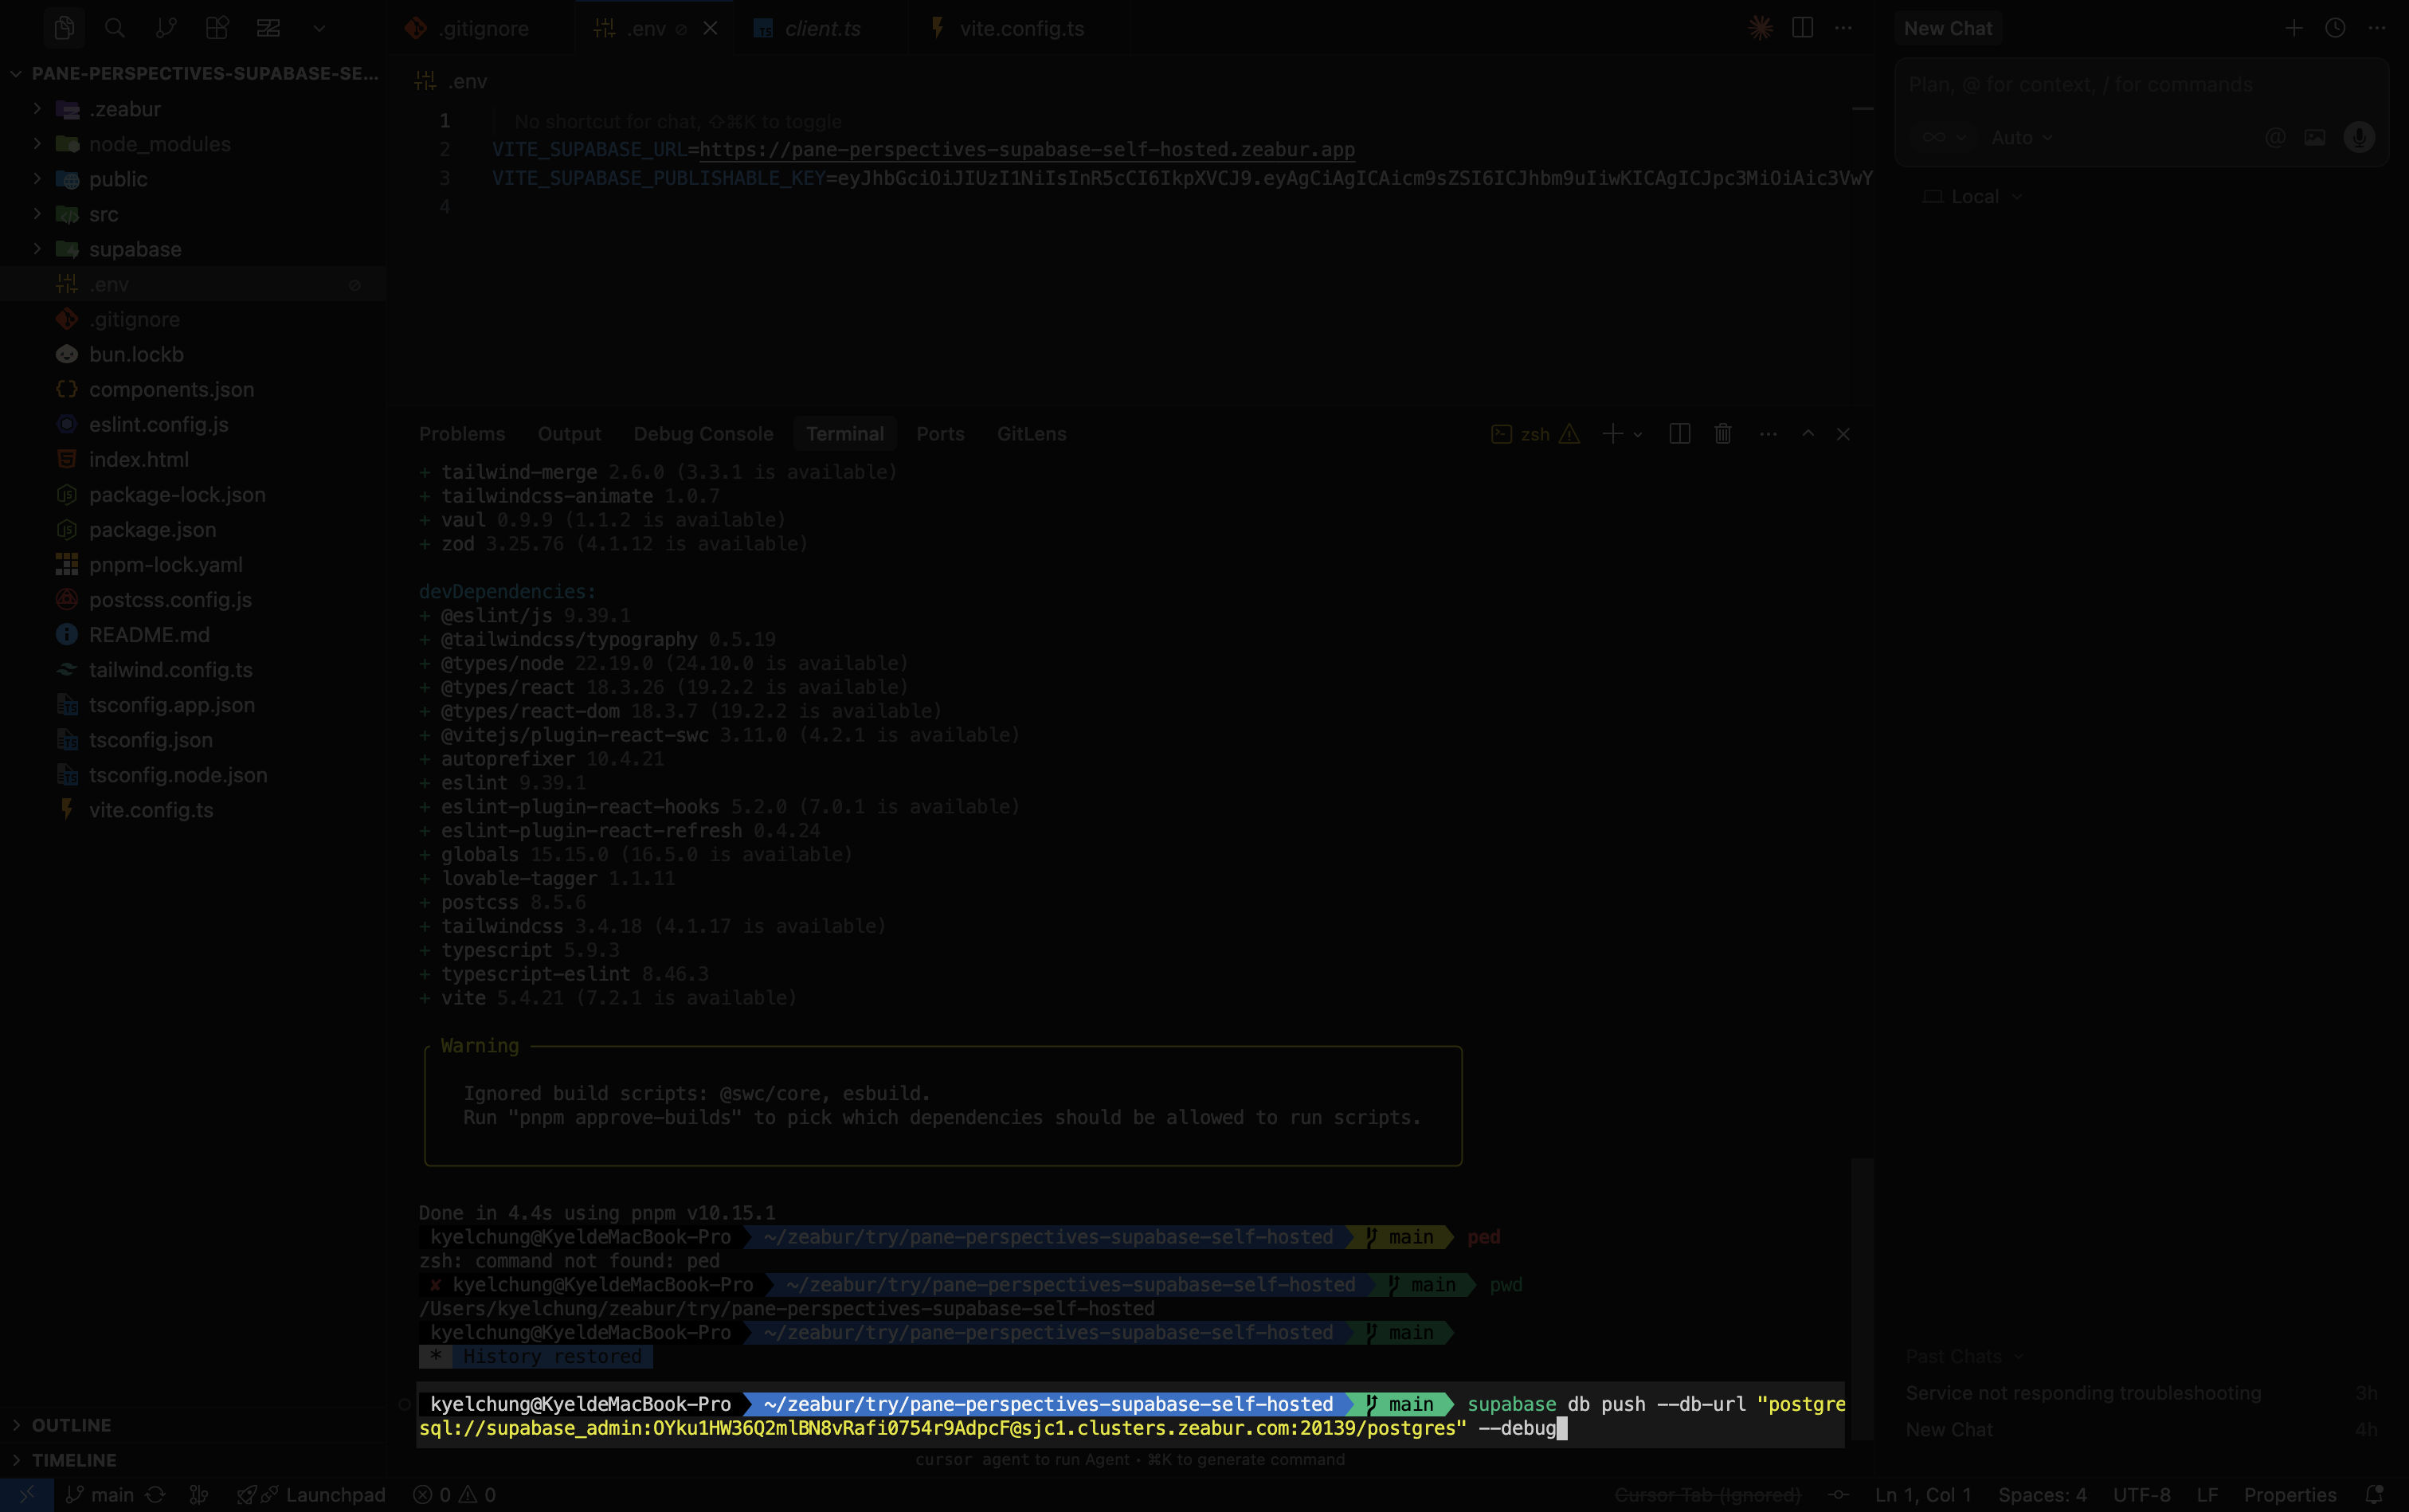
Create a
.envfile in your project root and add the credentials from Step 2.3:VITE_SUPABASE_URL=[your-url-from-step-2] VITE_SUPABASE_ANON_KEY=[your-anon-key-from-step-2] -
Run the development server locally:
npm run dev
-
-
Synchronize Database Schema: Execute the following command in your terminal to push your database schema to Supabase (ensure you have cloned the repository locally first):
supabase db push --db-url "[your-supabase-postgresql-connection-string]" --debug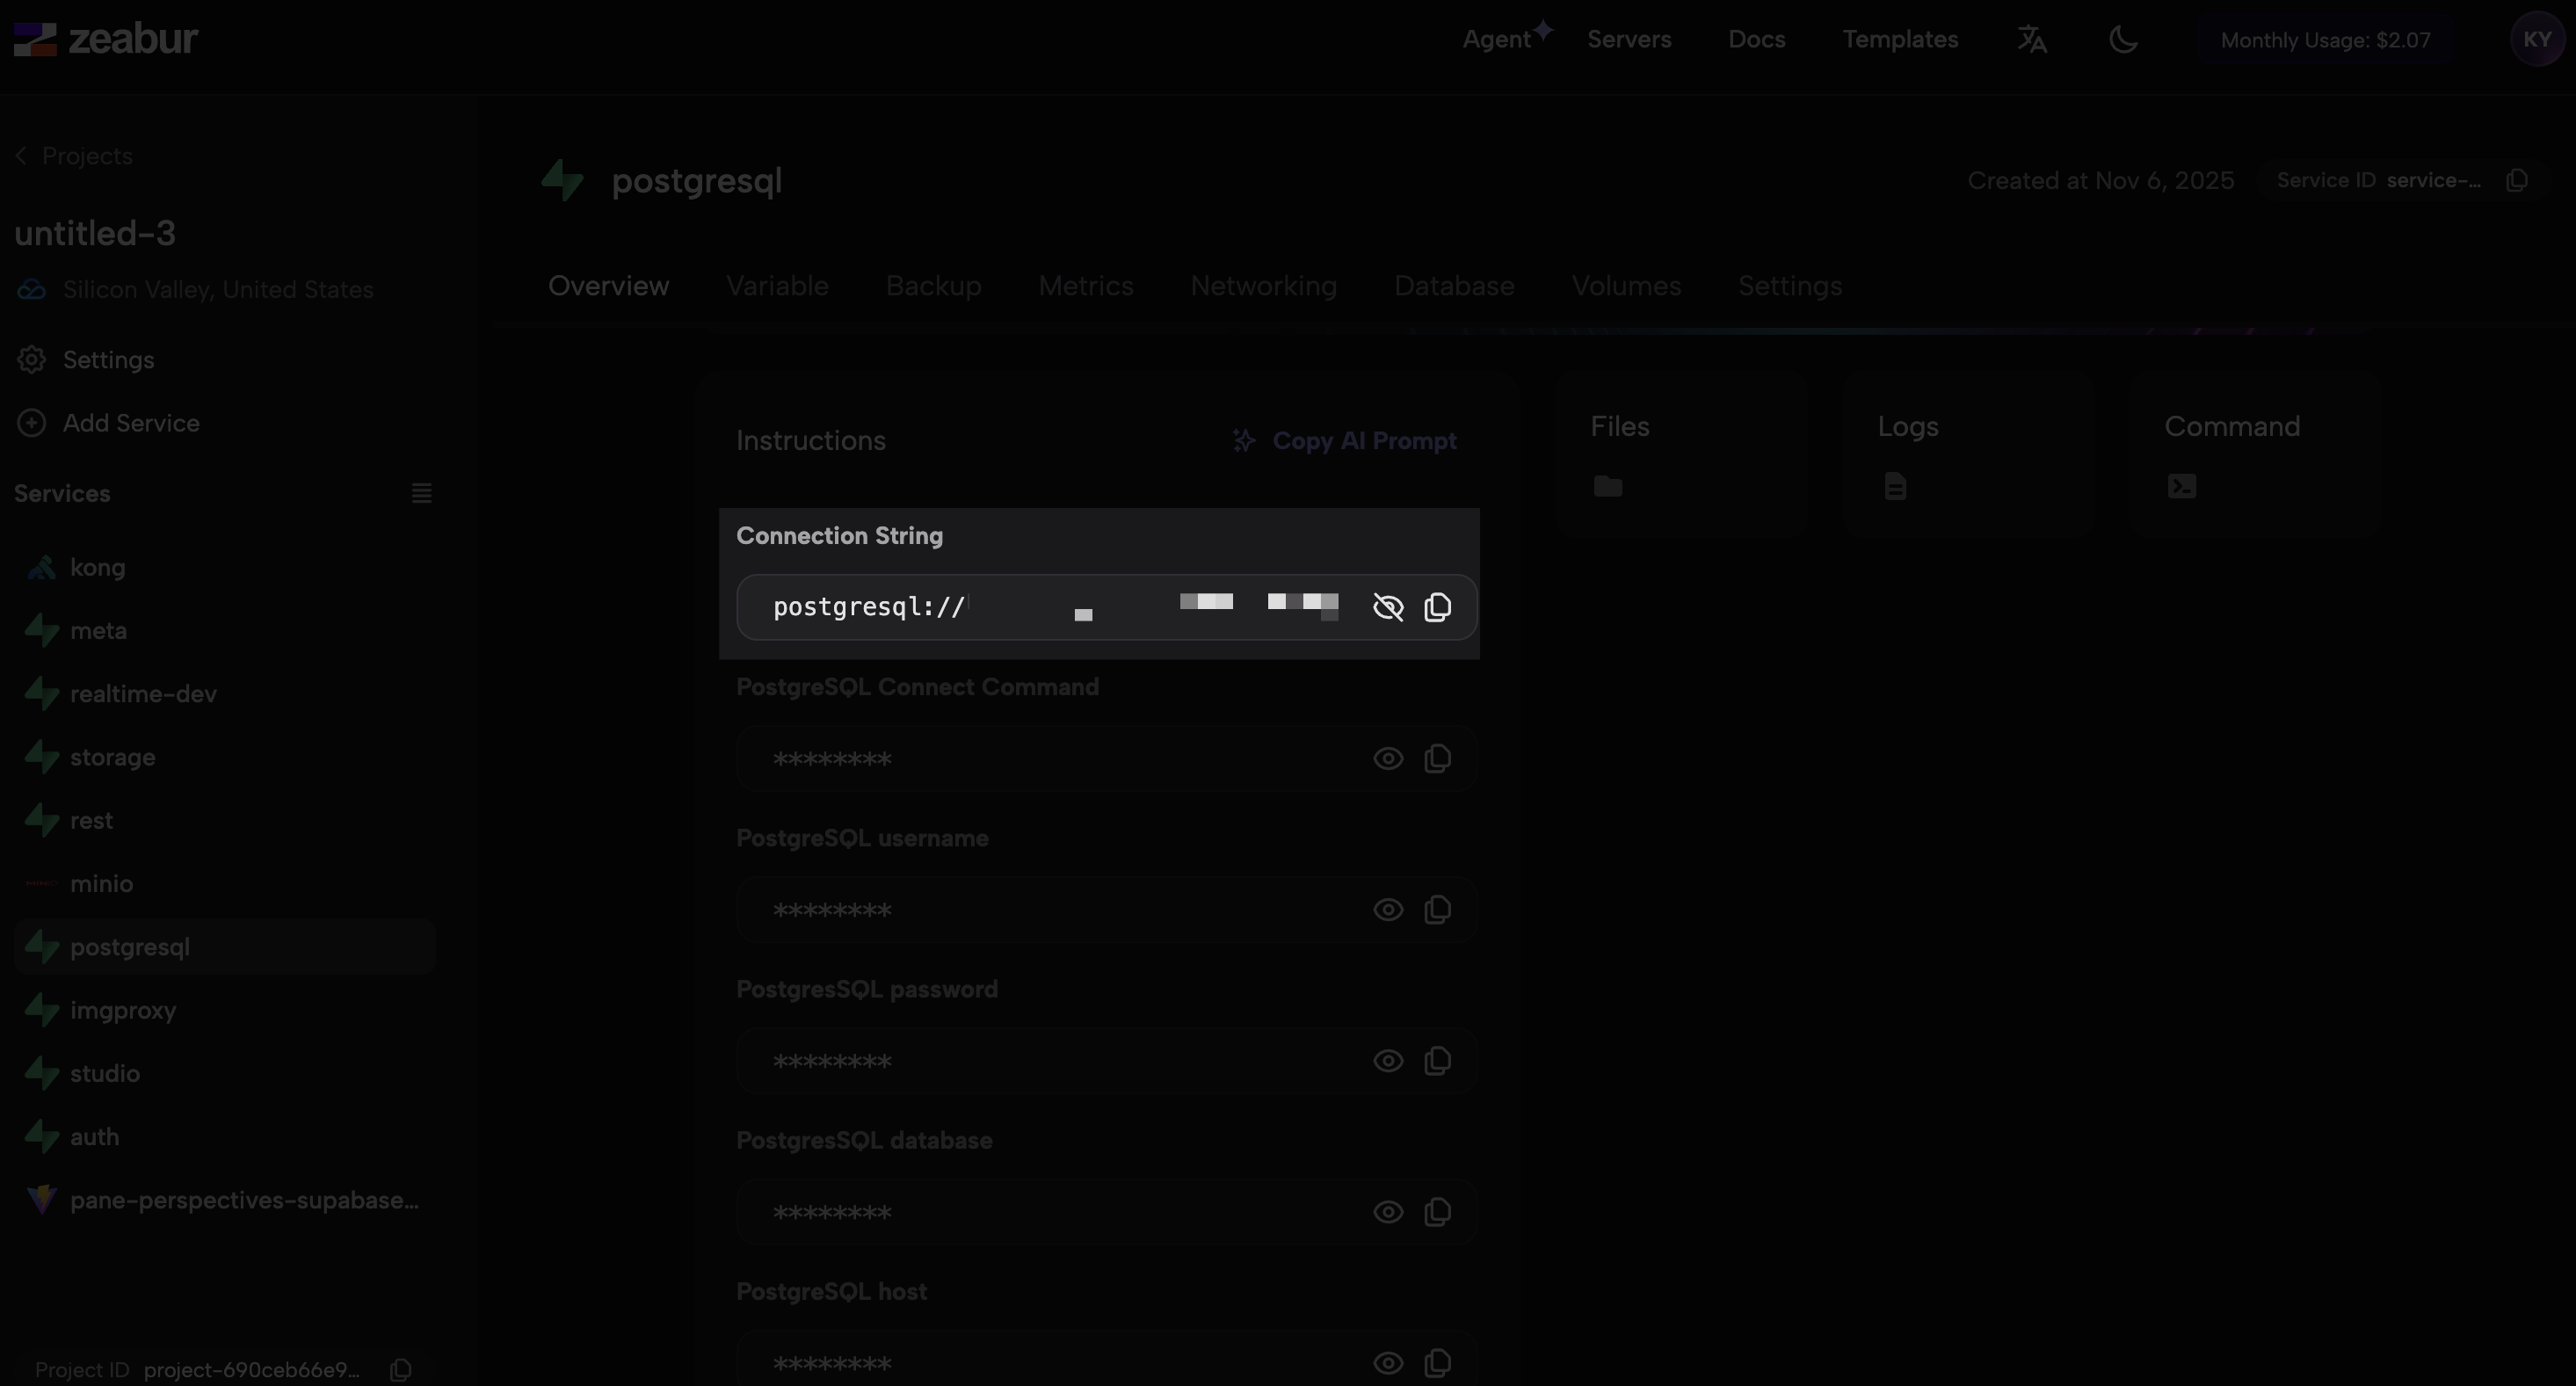
-
You can obtain the PostgreSQL connection string from the Zeabur PostgreSQL service panel in your project dashboard.
-
Then insert the connection string into the command above.
-
Hint: Please make sure the credentials file such as
.envis listed in your.gitignorefile.
Step 4: Setting Up Your Project on Zeabur
With your code now on GitHub, you can deploy it using Zeabur.
-
Create a New Project: In your existed supabase project in Zeabur dashboard, clicked
Add Servicesin the top left panel -
Deploy from GitHub: Choose to deploy a new service from a GitHub repository.
-
Select Your Repository: Zeabur will show a list of your GitHub repositories. Select the one you just created with Lovable.
-
Click Configurable and paste those supabase credentials inside the Environment Variables then click
nextandDeploy -
Add a desirable domain name: In Networking public section, click
Generate Domainthen type in the domain name you like
Step 5: Deploying Your Application
After connecting your repository and configuring the environment variables, click the deploy button. Zeabur will automatically build and deploy your application. Monitor the deployment logs to track progress. Once complete, Zeabur provides a public URL where your application is live.
Step 6: Continuous Updates with CI/CD
With your deployment pipeline established, updates become effortless:
- Make Changes in Lovable: Go back to your Lovable project and make any desired changes to your application using the AI-powered editor.
- Push to GitHub: When you save your changes in Lovable, they are automatically committed and pushed to your connected GitHub repository.
- Automatic Redeployment: Zeabur will detect the new commit on your repository's main branch and automatically trigger a new build and deployment.
- Verify Your Changes: Once the deployment is complete, your updated application will be live at the same Zeabur URL.
This workflow enables rapid iteration and instant deployment of improvements.
Wrapping Up
This integration of Lovable, Supabase, and Zeabur creates an efficient development workflow. You can build AI-powered applications quickly and deploy them with minimal configuration, allowing you to focus on creating features rather than managing infrastructure.